


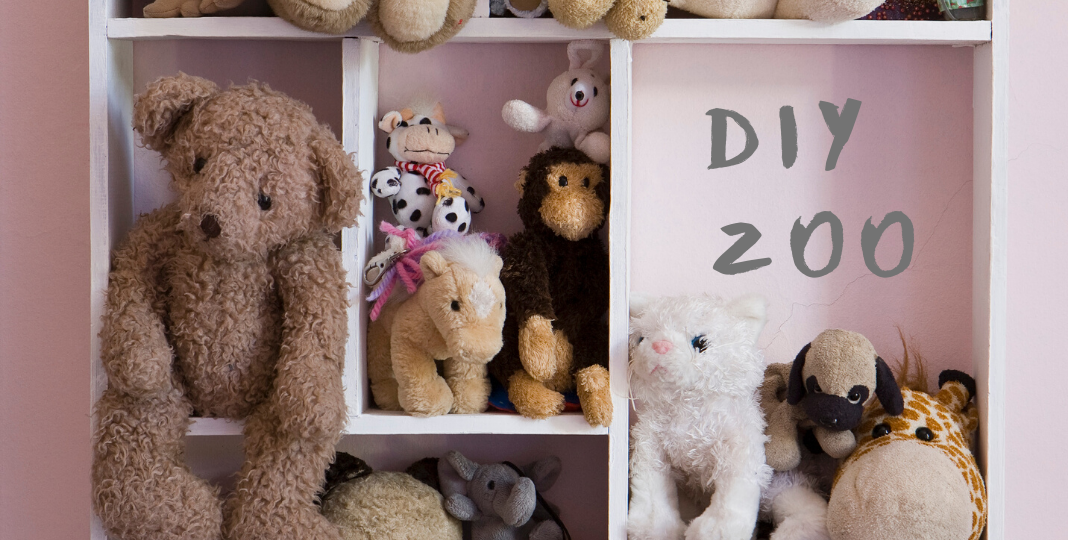
Amelia’s stuffed animals were OUT. OF. CONTROL.
She is 8 months old… it was only going to get worse!
Such a perfect opportunity for a DIY project.
Enter Pinterest search resulting in a combination of my own DIY Zoo!
Supplies:
- 9 – 1” x 4” x 18”(2- 8’ boards)
- 4 – 1” x 2” x 3’ ( 2 – 8’ boards)
- Spool of ¼” Nylon Rope
- 24 – ¼” Screw Eyes
- Allen Wrench or Small Screwdriver
- 16 – 1 ⅝” Screws
- 16 – 1 ¼” Screws
- Drill
- White Paint
- Paint Brush
- Wooden Letters (ZOO)
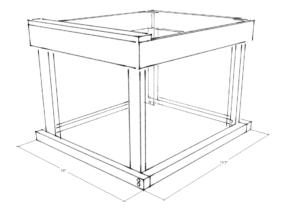
Step 1: Create a square with 4 – 1” x 4” and connect with two 1 ⅝” screws on each corner. I drilled pilot holes before screwing in to prevent boards from cracking. This is your base.
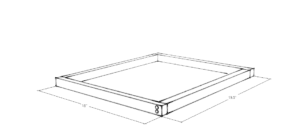
Step 2: Repeat Step 1 This is your top.
Step 3: Attach each 1” x 2” to the four corners of a square you just made using 2 – 1 ¼” screws on each corner
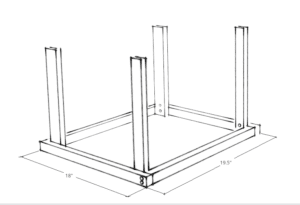
Step 4: Repeat Step 3, setting the tall posts inside the top square making sure your top 18” sides are on the same sides as the bottom.
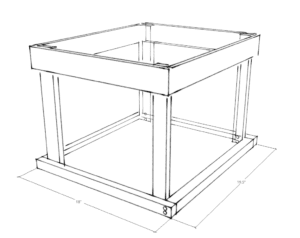
Step 5: Add your last 1” x 4” to the top laying flat across the top front of the zoo.
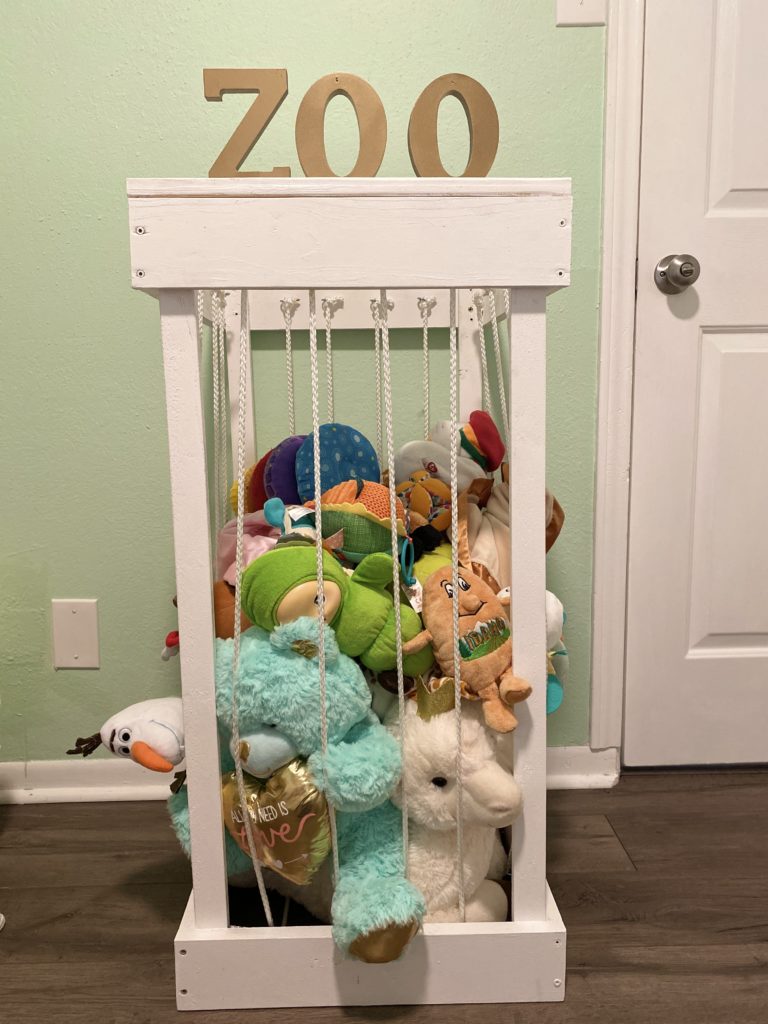
Step 6: Paint that sucker white!
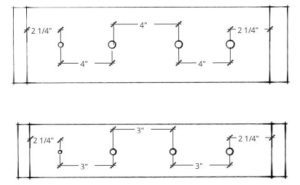
Step 7: Place 6 eye screws on each side, 3 on the top and 3 on the bottom. The Spacing for mine are below so you can ensure that they are evenly spaced. Using an allen wrench or a small screwdriver to slip into the eye of the eye screw. This provides some leverage to spin.I made pilot holes before screwing these in as well. (Top = 19.5” side, Bottom = 18” side)
Step 8: With your rope thread and knot above the top of the screw eye, go through the bottom directly under, then thread directly across and then up ending with a knot. Repeat this on the remaining 2 screw eyes on that side.
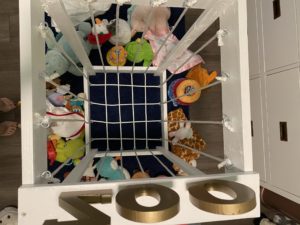
Step 9: Repeat Step 8 but on the opposite side. As you go across the bottom go under and over already strung rope to interlace the rope and create the bottom structure of the zoo.
Step 10: Spray Paint your letters and using the 1 ¼” screw and attach from the bottom of the board laying flat on the top. Making sure to center the letters.
Step 11: Fill that DIY Zoo with stuffed animals.


